Oct 05 2011
Grilled Pizza
This is, by far, the best pizza I’ve ever made in my life. Yes, ever. And I’ve made a few pizzas, even going so far as to store my own partially-baked crusts in my freezer.

But unless you have a wood-burning oven in your home, or have jimmied your self-cleaning oven to allow extremely high temperatures without locking the oven, you might struggle to make a pizza from scratch, with results you’re happy with.
Okay, maybe you can do it if you have a pizza stone. I did, long ago, but didn’t really know how to cook back then. My idea of making my own pizza was to buy a pre-baked pizza crust from the store, and add my own toppings. But then a shelf fell out of the wall in my utility room, and my pizza stone tumbled down with it. (I, um, hadn’t used it in awhile.) Broken in several pieces after that journey from near ceiling to floor, the stone went out in the trash.
This summer, I tried a new stone, safe for the grill, that everyone raved about. Unfortunately, I did not have those great results. It scorched the pizza in about 3 minutes. Rather disappointing, I admit, especially because rather than use my own recipe for dough, I used theirs.
Back to the store it went, completely ruined after just one use.
Frankly, you don’t need the fancy stuff. Just a grill. Charcoal or gas, doesn’t matter, though I like the convenience and control my gas grill affords me.
I have to thank my brother for the aluminum foil trick. While not necessary, it does make an easy task of transferring a topped pizza to and from the grill. I like easy. But, if you’re avoiding aluminum for health purposes, you can skip this step – just make sure you have the crust cooked pretty thoroughly before adding toppings. Or use a good quality pizza peel.

I made the first batch of these pizzas Saturday night before the Badger football game. If you’re a Nebraska fan – welcome to the Big 10! 😀 ) That would be where the super-thin crust pizza came from (though the picture was taken the next night, after I heated up leftover pizza for the Packer game – still delicious, by the way). I refrigerated the leftover dough until Tuesday, figuring the extra time would only deepen the flavor of the crust.
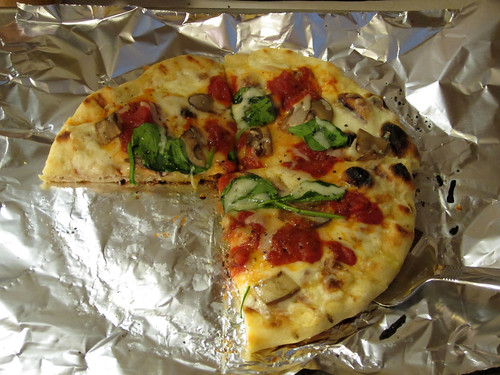
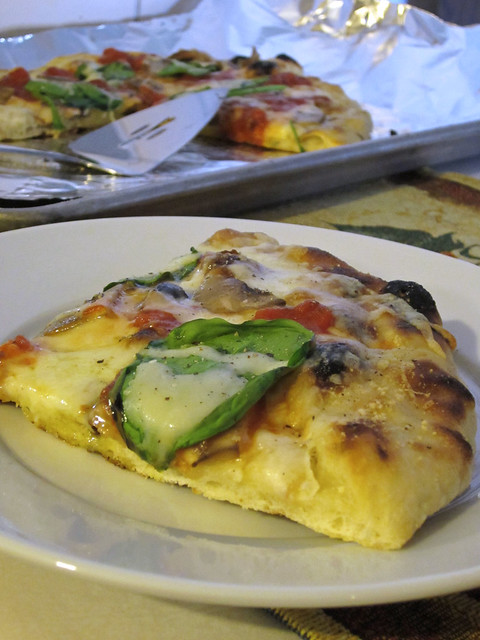
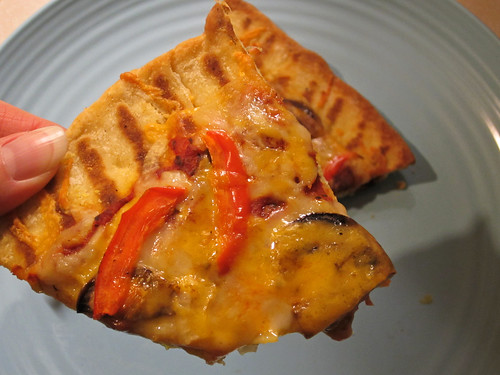
I was not disappointed. In fact, I can say without a doubt, the Tuesday pizza is not only the best pizza I’ve ever made, it’s one of the best I’ve ever had: crisp on the bottom, slightly chewy throughout, with a very rustic feel and appearance. And since I had some toppings and sauce left from Saturday, I was able to throw it together very quickly, even considering I washed my hands and snapped a picture between virtually every step of the process.
you may also like:
BBQ Chicken Pizzas
Individual Pizzas
Mushroom and Goat Cheese Pizza
Thin Crust Pizza
Make-Ahead Pizza Crusts
around the web:
Zucchini Pizza Boats
Margherita Pizza
Crispy Kale and Chevre Pizza
Pizza Bianca
Stuffed Pizza Bites
Taco Pizza
Grizzed Pizza
3 1/2 cups (445 grams) bread flour, plus more for dusting board
1 teaspoon sugar or honey
2 1/4 teaspoons (1 envelope) active dry yeast
2 teaspoons salt
1 1/2 cups (355 mL) hot water (105-110F/40-43C)
2 tablespoons (30 mL) olive oil, plus more for brushing bowl and dough
cornmeal
heavy duty aluminum foil or pizza peel
desired sauce, cheese, and toppings
recommended: whole milk mozzarella, parmesan, monterey jack, cheddar, chevre, chunky tomato sauce, store-bought jarred alfredo sauce, assorted vegetables, assorted cooked meats, extra virgin olive oil for drizzling
Combine yeast, sugar/honey, and water in the bowl of stand mixer (or a large mixing bowl). Let proof for 5 minutes (should get foamy and smell yeasty). Add olive oil, combine with dough hook (or wooden spoon if making by hand). Add flour and salt, stir on low to combine. Increase speed to medium-low (or stir with wooden spoon) until mixture forms a ball. If it’s too sticky, add flour a tablespoon at a time; if it’s too dry, add water a tablespoon at a time.
Knead on medium (or transfer to a floured board and knead by hand) speed until smooth.
Brush a large glass bowl with oil and transfer dough to bowl. Roll the bowl around in the bowl to coat it in oil, then cover with plastic wrap. Let rise until doubled in size, about 60-75 minutes, depending on temperature of room. Punch down dough and let rest 10 minutes.

Remove dough to floured board. Run a sharp knife or bench scraper under cold water, then divide dough into 4 equal pieces*. Return one piece to large bowl, recover with plastic. Oil 3 small-medium bowls and divide remaining dough among them; cover with plastic.
Let dough rise at room temperature until puffy. Alternately, you can refrigerate the dough for a few days, for more depth of flavor and/or convenience. It will rise on its own in the refrigerator. If using refrigerated dough, give it an hour or two to reach room temperature, then proceed with recipe.
Preheat grill (high heat).
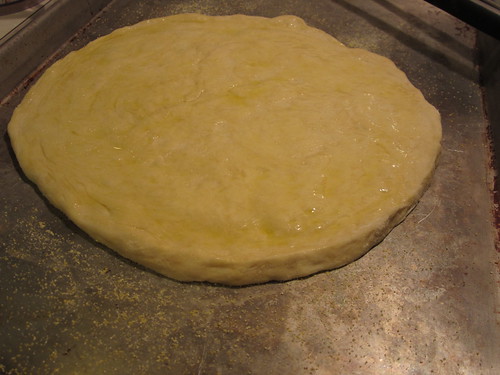
Punch down first ball of dough, let rest 10 minutes. Dust board or work surface with flour. Transfer dough to board and sprinkle with flour. With a floured rolling pin or hands, roll or press dough with fingers into a circle.
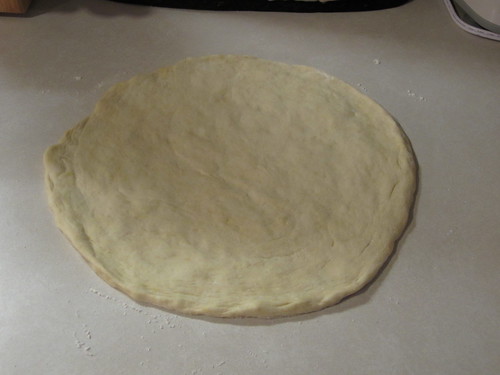
For a thinner crust, a rolling pin is useful; to keep rolled crust thin, prick all over with a fork to inhibit puffing up. For a more rustic crust, use your hands and forget the rolling pin and fork; this will allow bubbles to pop up when grilling. (Note – if the dough wants to shrink back after you stretch or roll it, walk away for five minutes to give the gluten a little more time to relax.)
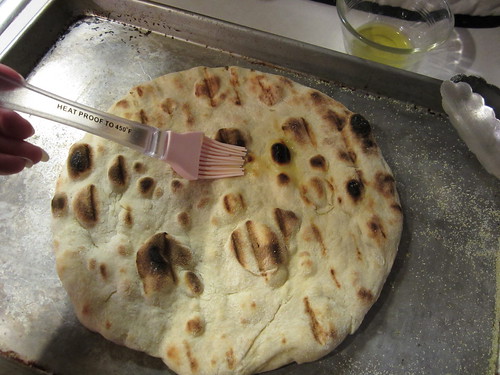
Sprinkle baking sheet with corn meal. Transfer crust to baking sheet (or pizza peel) and brush top with olive oil.
Place crust, oil side down, on hot grill grates (I use my hands but turn down the flame before putting the crust on, then turn the flame back up to high).
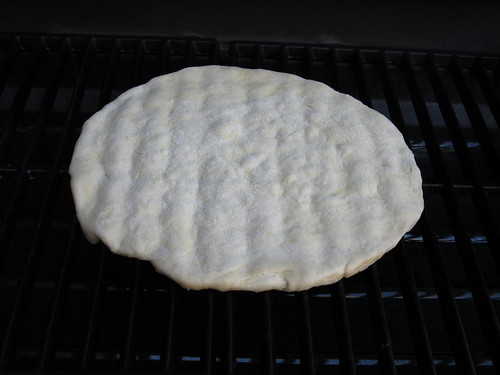
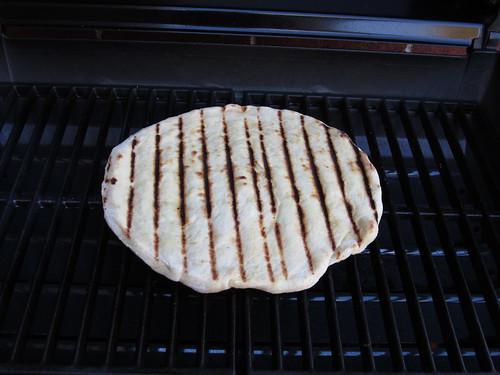
Close grill for 2-3 minutes, checking as needed based on your crust thickness. Use a tongs to check the underside of the dough while cooking, reducing flame if necessary.
By this time, the crust should be pretty well cooked.
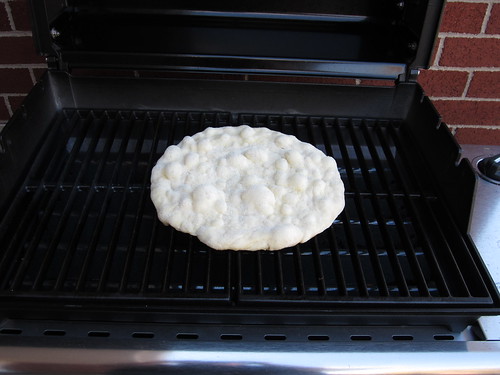
Using a long tongs, carefully flip the crust over for a minute or two. If you poke a small hole in the crust – don’t worry, the toppings will help cover it up.
Slide the crust onto your baking sheet. Back in the kitchen, transfer the crust, original oiled side down, to a sheet of foil (shiny side down) several inches wider than your pizza; you’ll want to be able to grab each side of the foil with your hands for easy transfer to the grill.
Brush top of crust with oil,
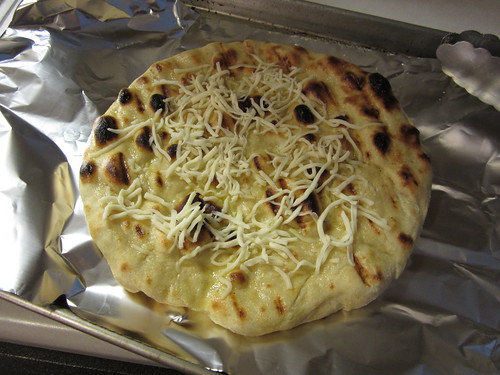
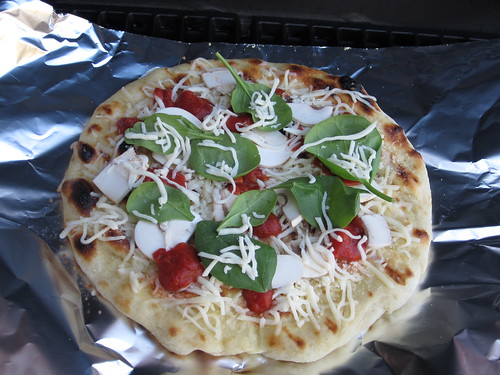
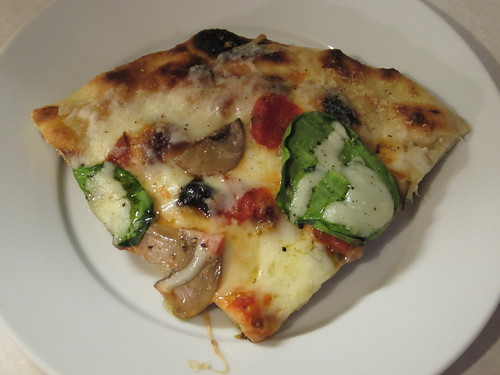
then add desired toppings, but don’t go overboard here; less is more. Season with a sprinkle of salt and pepper.
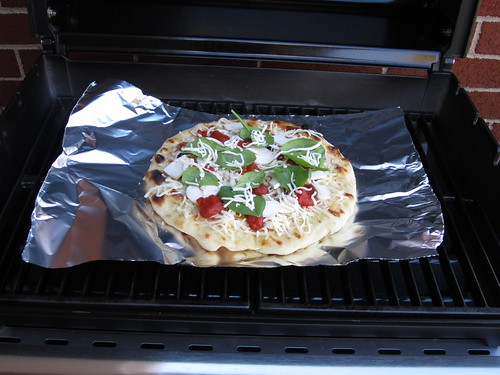
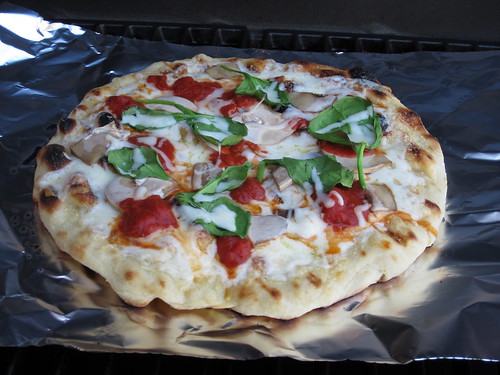
Place foil on grill, close cover and grill until cheese is melted and bubbling. With a tongs, grip the foil and pull onto baking sheet for easy removal.
Let pizza rest 3-5 minutes (go for the 5 minutes if you’ve got vegetables – especially mushrooms – to give them a chance to reabsorb their juices). If desired, drizzle with extra virgin olive oil. Cut, serve, and enjoy!
*Larger pizzas are more difficult to manage when grilling; it’s more difficult to transfer the dough to the grill, and especially to flip it over. Smaller pizzas may take more time, but they really do take less effort. Probably less swearing, too.


This looks insanely good.
When you say “best pizza ever” I need to try it. especially after those yummy pictures!
I think the admin of this web site is really working hard in favor of his web page, for the reason that here every material is quality based
data.